
TrueInsight
Siemens/Altair Channel Partner
Menu


How to Utilize Groups in Altair SimLab
Altair SimLab includes some great automation tools for study setup, in this post we show how to utilize the group feature.
Altair SimLab is a powerful Multiphysics tool, that enables users to setup various types of studies in a fraction of time. I have written before about some of the great features within SimLab, but one of the really powerful features of SimLab is its automation workflows. Macros, scripts, and various types of automation can be set up to run studies more efficiently in Altair SimLab. One of the great tools I use all the time in SimLab is the group feature, groups in SimLab enable streamlined workflows for meshing, applying load and boundary restraint conditions, and visualized results. In today’s blog I am going to walk you through how to utilize groups in Altair SimLab.
What are Groups in Altair SimLab?
Before I step you through the process of how-to setup groups in SimLab, I think it’s important we understand what groups are. A group in Altair SimLab (Figure 1) is a named collection of entities, these entities can be CAD based (faces, edges, vertices) or FEM based (nodes, elements). For example, say you are trying to localize all elements on a particular face, a group allows you to do this. Groups can be particularly handy because they allow you to not have to reselect faces multiple times and can be used for mesh controls, loading, and boundary conditions. By creating a group, it makes it very easy to come back and adjust that entity set later.

Figure 1: Altair SimLab Group Dialogue Box
Group Creation on CAD Geometry in Altair SimLab
So, let’s now jump into the process of creating groups in SimLab. For this blog, I am going to use a set of stairs as my CAD file. Groups are particularly useful with multiple faces or bodies, so the stairs geometry I will be using is a good geometry for groups as it has multiple faces (Figure 2).
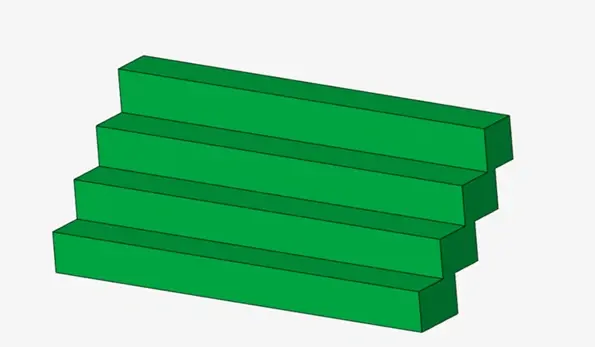
Figure 2: Staircase Geometry
For this model, I want to create three different groups, I want to create a group for all the faces on the front of the stairs, then I want to create a different group for all the faces on the back side of the stairs, and then lastly I want to create a final group for the side faces of the stairs. To create a group, I need to first highlight all the faces I wish to lump into one group, in this case, I will highlight all the front faces, and then I will right click and hit the option: “Create Group” as shown in Figure 3.
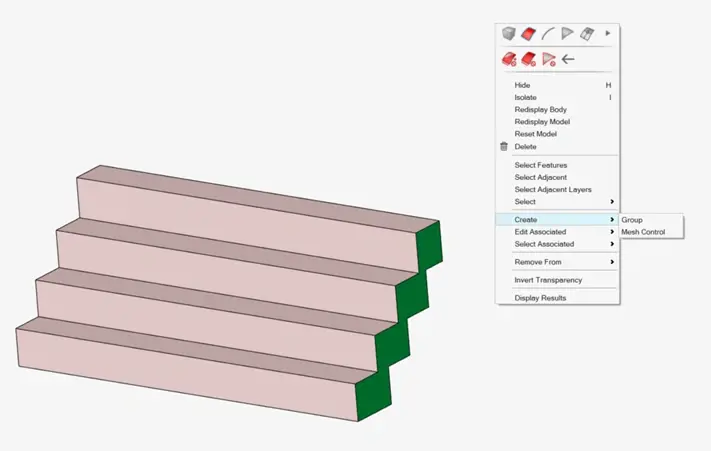
Figure 3: Creating Group for Front Faces of Stairs
Immediately after clicking create, the group dialogue box will pop up. It will first give you the option to name the Group. I would suggest when you are doing this, name it something you will remember, I will name this group as “Front_Stair” as it represents the faces on the front of the stairs. The dialogue box will also ask you what type of group you wish to make it, in this case it will be a face group, and lastly, we can specify the group color. With these options selected (Figure 4), we can hit apply and it will create the group for us!
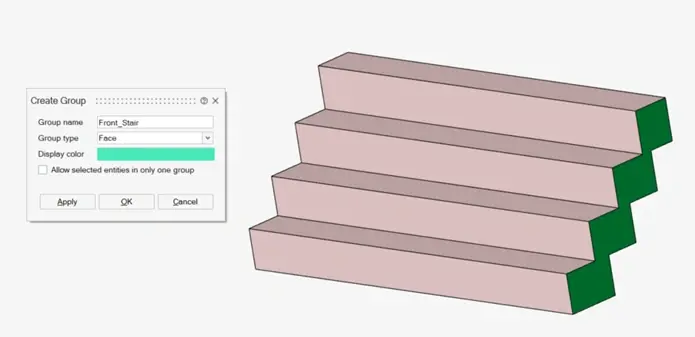
Figure 4: Creating Group for Front Faces of Stairs
I will now do the same step and create groups for all the faces on the back of the stairs and create an individual group for them, and then also create a group for the side of the stairs. After I create these additional groups, I can go to the groups browser and see the groups I have created. In the groups browser, I see I have three groups, and by clicking on each group icon it will show what entities belong to each group. Let’s click on the Front_Stair group, after clicking on the group the SimLab graphical window will only show the entities that below to the Front_Stair group, which are the front faces (Figure 5).

Figure 5: Front Stair Group Visualized
Utilizing Groups in Altair SimLab Solution Setup
Now that our groups have been created, what can we utilize them for? In our case I am going to go through a few different scenarios, I will first use the groups I generated to create mesh controls and then to apply boundary conditions for a structural scenario! Let’s first create mesh controls for the specific groups we created. To do this, click on the mesh control icon and then once we are active in the mesh control click on face mesh control and then we just need to click on the group we wish to apply the mesh control to (Figure 6).
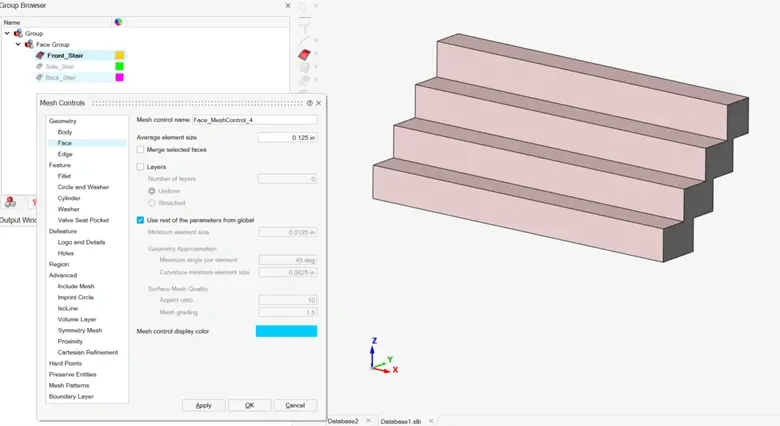
Figure 6: Mesh Control for Front Stair Group
By having all the groups generated, I do not have to reselect all the faces, and I can go through the mesh control process efficiently. I will create three unique mesh controls for my stairs, and then I will generate the mesh for my model. The final mesh I generated is shown below in Figure 7.

Figure 7: Meshed Stair Model with Unique Mesh Controls from Groups
Now that our model has been meshed, we can set up our study. We will set up a basic linear static study where we will restrain the sides of the stairs, and apply a load on the front of the stairs. One of the cool things about groups in SimLab is that the same group that was applied for CAD data can be applied to FEM data. We just need to transfer the CAD group to a FEM group. This is done very easily by right clicking on the group browser and hitting transfer, then selecting the CAD Body to transfer the groups to the mesh body (Figure 8). After clicking ok you will see that the groups browser has the old CAD groups and the new mesh element groups.
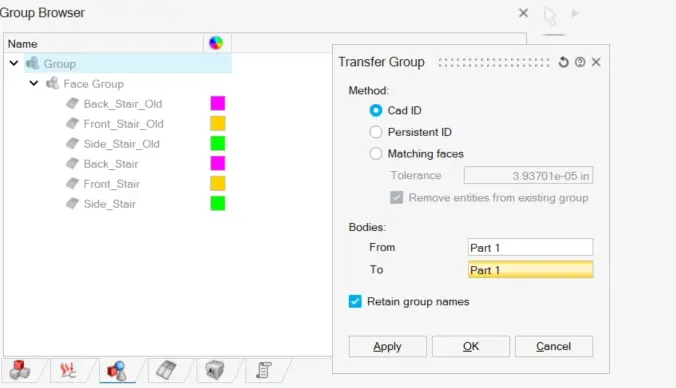
Figure 8: Transfer CAD Group to Element Group
Now that the element groups have been created, I can apply the boundary conditions of our model, I just need to click on the group and select the boundary condition I want. I will apply a fixed restraint on the side of the stairs using the Side_Stair group and apply a pressure load to the Front_Stair group (Figure 9). With our model now setup, we can run our simulation!
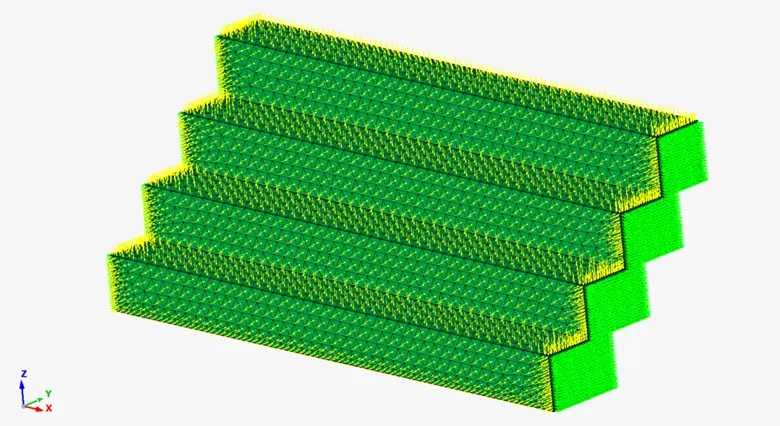
Figure 9: Boundary Conditions on Side and Front Stair Groups
Utilizing Groups with Altair SimLab’s Results Viewer
One of the other neat things you can do with Altair SimLab groups is to utilize groups to view results on isolated locations in SimLabs result viewer. When a model completes in Altair SimLab it will show the full model. However, we can localize our results to be just for an individual group. To do this we need to go to the group browser and click on an element group and then it will only show on the screen the groups selected. In this case, I will select the Front_Stair group, and then I will see my results update to only faces of the group selected (Figure 10). In this case we just see the faces of the front of the stairs, and we can quickly see the stress and displacement results we need!
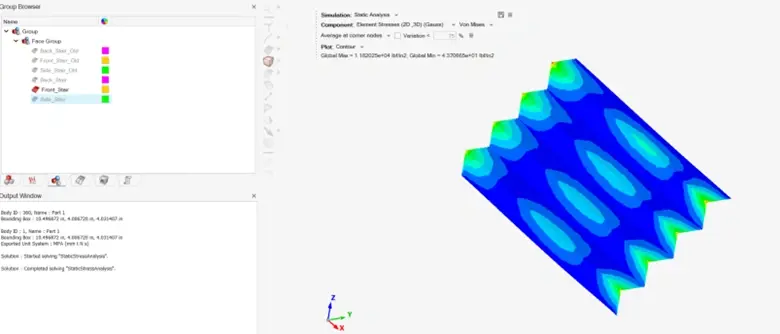
Figure 10: Visualized Results Using the Group Browser for Front_Stair Group
So just like that we have gone through how you can use groups in SimLab! One of the other things I should note, if you are currently writing python scripts in SimLab, groups can also be a handy tool for writing scripts. I hope this has illustrated to you the efficiency of groups in Altair SimLab, try it out on your own! If you have any further questions on Altair SimLab or any other Altair solution, please reach out to us here at TrueInsight!