
TrueInsight
Siemens/Altair Channel Partner
Menu


Accessing the Different CFD Post-Processors in Altair SimLab
Altair SimLab boasts multiple post-processing solvers. In this post we show you how to access them quickly.
Altair SimLab is a powerful Multiphysics tool capable of running many types of studies ranging from electromagnetics, to structural, to fluid flow studies. One of the cool things about SimLab, is it has some great post-processing tools to understand simulation scenarios more clearly. In today’s blog we will look at some of the specific post-processing options for fluid flow studies, i.e. CFD-based solutions. In SimLab there are two specific post processors built directly into the SimLab GUI for CFD as well as a third option where you can export results to Altair HyperView. I will run through the steps on how to access each post processor on a sample mixing elbow CFD simulation (Figure 1), as well as how to export to HyperView in this blog post!
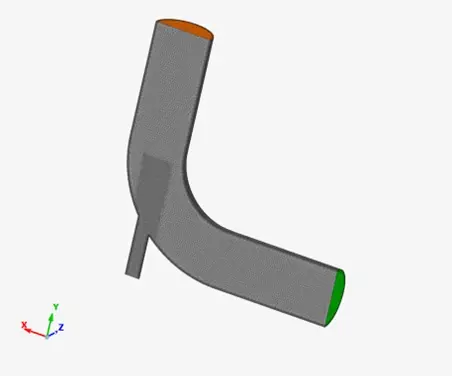
Figure 1: Mixing Elbow for CFD
Accessing the Multiphysics Post-Processor:
So, let’s first discuss the first type of post-processor in SimLab: Multiphysics Post-Processor. This post-processor is the standard post-processor in SimLab and is used across the board with multiple studies whether its CFD or Structural or electronics simulation. After setting up a fluid CFD study, users will run their study and when the study completes a box will pop up prompting the user to decide which post-processor they wish to use. For this post processor, the user will select the first radio button: Multiphysics post-processing as shown in Figure 2.
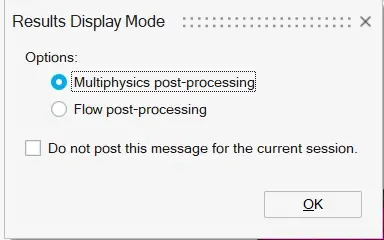
Figure 2: Types of CFD Post-Processors
Immediately after clicking ok, the main graphical window of SimLab will populate with the generic post processor. In this case users can create contour or streamline plots specific to a CFD study. In my case, I can visualize the velocity of this mixing elbow with this main post-processor (Figure 3).
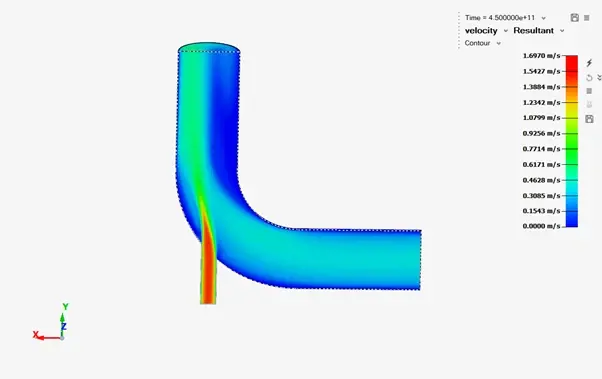
Figure 3: CFD Results with General Multiphysics Post-Processor
This post-processor has been in SimLab for a while, and it was the traditional post-processor for CFD cases. However, a few releases back a specific CFD post processor was added which gives users more flexibility in how they create streamlines or advanced CFD plots. This post-processor is similar to the one utilized in Altair HyperMesh CFD, but its built directly into the SimLab interface. It has a bit more power than the standard Multiphysics Post-Processor.
Accessing the Flow Post-Processor:
Let’s now look at how to access the Flow Post-Processor, a specific CFD post-processor that was added to SimLab to give users more advanced results capabilities for CFD cases. The first method to access the post-processor is to just click on the second radio button from Figure 2 after running a simulation and then hitting ok. However, if you happened to have already hit ok for the general Multiphysics Post-Processor, there is a specific method to access the new CFD post processor. Users will have to detach the results from the general Multiphysics Post-Processor and then reattach the results to access this post processor. Simply put, if you have already started to view results with the default post-processor, you have to turn off the post-processor and then select the Flow Post-Processor. This method can also be done if you happened to click the Flow Post-Processor first, and want to go back and access the general Multiphysics Post-Processor.
How to Detach and Reattach Results:
To detach results in SimLab, the quickest way to do this, is to double click on a boundary condition and then hit OK. Note: When you double click on a boundary condition it will open it up, you do not need to change the boundary condition value, just hit ok. After hitting ok, a warning will pop up saying you will delete results, you can hit “Yes” on this (Figure 4). This warning is not technically deleting the log file, it is just deleting the active results on screen.
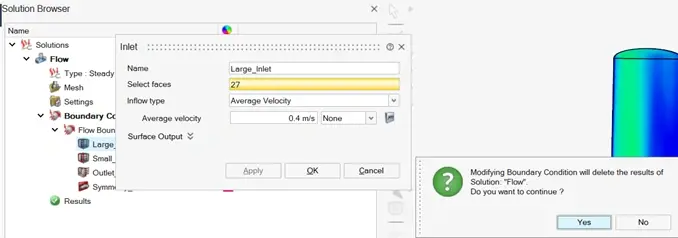
Figure 4: Detaching Results in SimLab
Once you hit “Yes”, the main graphical window will update where results will no longer be displayed. You will just see your model with its prescribed mesh and boundary conditions. However, no results will be displayed, you will also see in the solution browser under results, a big red X, which means no results are associated with this study (Figure 5). However, do not fret, we can still access the previous results file we ran, there is no need to rerun the study!
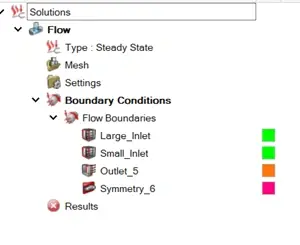
Figure 5: Officially Detached Results in SimLab
Now that the result has been detached, we can reattach the result. This does not mean rerunning a simulation, the CFD scenario we already ran still has a finished result file we can use. So please do not go and re-run a study, this step will save you a ton of time! Right click in the solutions browser on flow and then select attach result and grab the log file where you ran the previous CFD study (Figure 6).
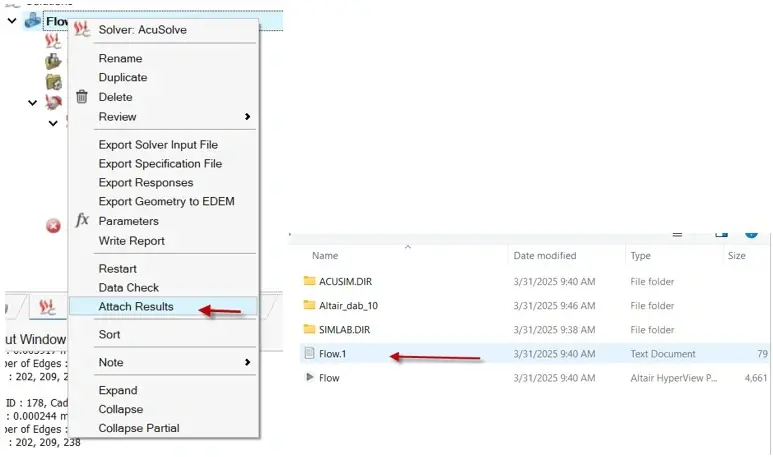
Figure 6: Left: Reattaching results in SimLab, Right: Log File Shown via Red Arrow
As soon as you reattach results, it will bring up the same post-processor prompt (Figure 2) and you can then select the Flow Post-Processor. This post-processor, like I indicated previously, has a number of additional features specific to CFD that the general Multiphysics Post-Processor does not have. So, say for instance you want to create an advanced streamline plot, or an advanced iso surface plot you can do with this post processor vs the general post-processor cannot (Figure 7).
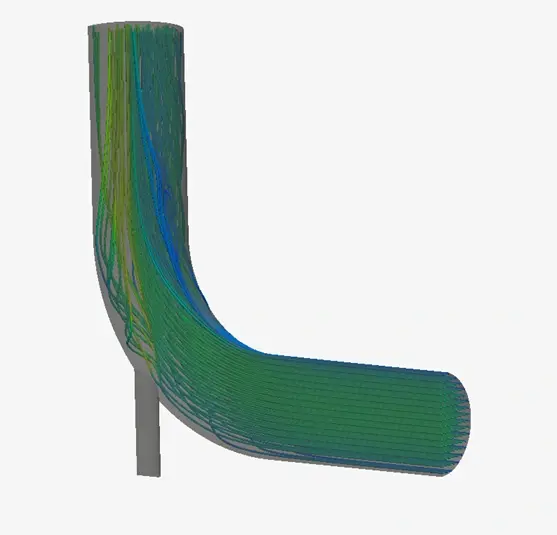
Figure 7: Streamline Plot in Flow Post-Processor in SimLab
Exporting Results to HyperView:
Our final option for CFD results post-processing in SimLab is to export our results to Altair HyperView. Altair HyperView is a dedicated post-processor, and it has some advanced plot tools like derived results or mathematical expressions, which may make it more useful than the other two post-processors built into SimLab. The process to open a SimLab CFD study’s results in HyperView is straightforward, we just need to make sure we request an H3D file when we run our study in SimLab. H3D files are specific files for use with Altair HyperView.
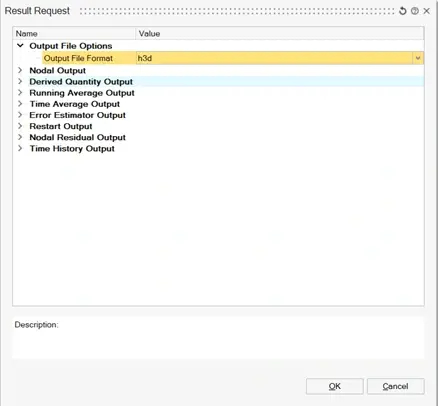
Figure 8: Streamline Plot in Flow Post-Processor in SimLab
The only step we need to take to export results to HyperView in SimLab, is to make a result request and request an H3D file (Figure 8). A result request needs to be made before running your simulation, so just make sure you change the default output file format for CFD which is logged to H3D (Figure 8) and then you will be able to view this result in HyperView. Also, even with this file format in H3D, you can still view results in the default post-processors in SimLab. Now that I have made this request, I can open and visualize the result in Altair HyperView, Figure 9.
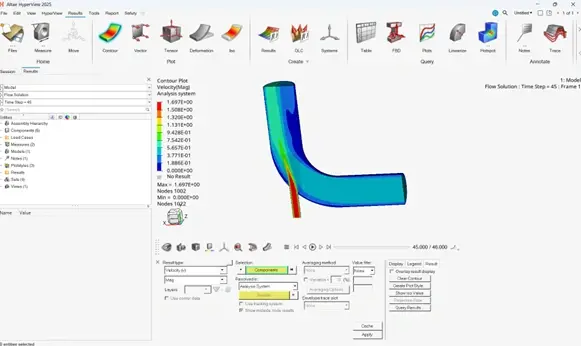
Figure 9: SimLab CFD study Results in HyperView
So, now that I have run through the different post-processing options for CFD in SimLab, I hope you can utilize these techniques to get even more valuable results for your CFD studies. If you have any more questions about Altair SimLab or any Altair solution, please reach out to us at [email protected] !