
TrueInsight
Siemens/Altair Channel Partner
Menu


How to Assign 2D and 3D Meshes to Individual Component Collectors in HyperMesh 2025
In this post we show how to use Altair HyperMesh to assign 2D and 3D meshes to individual components.
After working for nearly two decades as a simulation analyst, I have learned several things that I implement to help with my daily simulation workflows. For example, one of the common things I do when I am working on any part or assembly analysis, is I like to organize a geometry I am working on into a 2D mesh and a 3D Mesh. The reason I do this is because I use the 2D mesh as a seed mesh for my 3D mesh, and I like the ability to go back and adjust the 2D mesh if needed. Therefore, it is very important for me to be able to access the 2D and 3D meshes quickly if I need to edit them.
That is where HyperMesh’s component collector feature comes in handy, as I can easily organize my 2D mesh into its own component collector and the 3D mesh into its own respective component collector. Having each of these meshes in their own component collectors makes them able to be easily edited. Note, by default, if you don’t organize 2D and 3D meshes into their own component collectors, HyperMesh will group them together into the same component collector. Thus, it’s important to understand how we can easily separate them if I want to edit them efficiently. In today’s blog I am going to step you through two common ways of making sure my 2D and 3D meshes are organized on their own component collectors.
Method 1: Using the Organize Tool to Move Meshes to Appropriate Component Collectors
Our first step is we need to create two component collectors, one for the 2D Mesh and then another for the 3D Mesh. To create a component collector, we need to access the component collector menu, and then click on the plus symbol (shown in red Arrow in Figure 1). In our case I am going to name the first component collector as 2D Mesh and then my second component collector as 3D Mesh. With my component collectors now set up, I can generate my meshes.
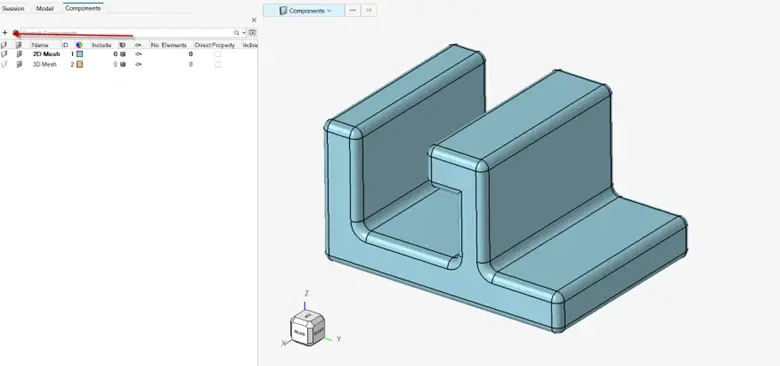
Figure 1: Creating 2D and 3D Mesh Components
Now while I have created components, I have not actually generated any meshes yet on my part. Remember a component is just a collector that stores geometry, part, and mesh information. Thus, since I have not generated any meshes yet, these component collectors are currently blank. So, let’s first create my 2D mesh on my bracket. We first check to make sure the component collector, 2D Mesh, is current. For reference, you can know which component collector is current by looking at the component menu, and the component collector that is in bold shows you the current component collector. In our case, I see the 2D Mesh component is bold, so I know it’s current. I can now generate the 2D mesh, and after I create the mesh I see that I have generated 13988 elements that are stored on the 2D Mesh component collector (Figure 2).
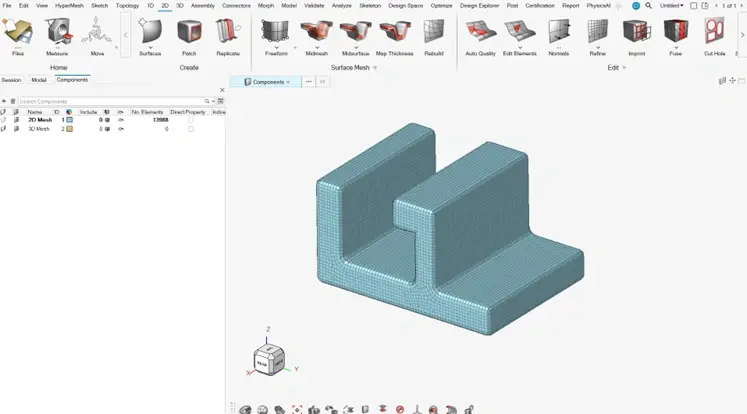
Figure 2: 2D Mesh showing on 2D Mesh Component
With the 2D mesh generated, we can now generate our 3D Mesh, which will utilize the 2D mesh as a seed mesh. I will go to the 3D Mesh menu in HyperMesh and select tet mesh and create my 3D mesh. After I create the mesh, you will notice that with the 3D mesh that I generated, all the 3D elements were put on the 2D Mesh component collector, which is not our desired output. The total elements now on the 2D Mesh component collector is 508886, so it’s clear the 3D elements were grouped into the 2D Mesh component collector.
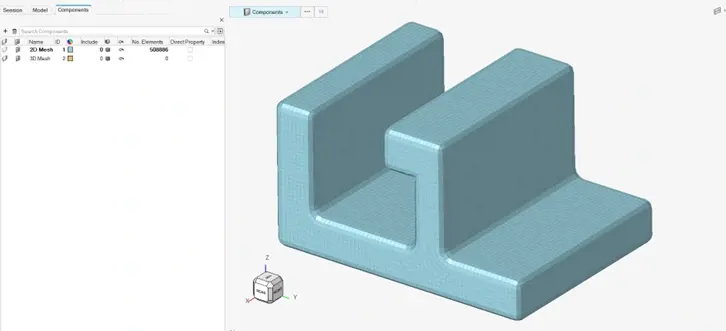
Figure 3: 3D Elements grouped into 2D Mesh Component
One of the great things about HyperMesh 2025 and the new interface is there is a command called Organize, which allows users to easily copy mesh and other geometry information into different collectors (load, components, etc). I will use this Organize command to copy the 3D elements into the 3D Mesh component collector. To do this, I go to the model browser in HyperMesh, and I right mouse button click on the 3D elements and select Isolate so only the 3D elements are showing in the main graphical window (Figure 4).
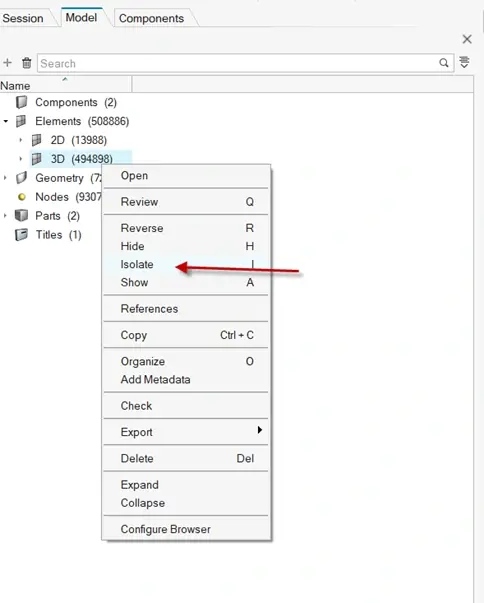
Figure 4: Isolating 3D Elements for Organize Command
After isolating just the 3D elements, I can highlight all the elements in the main graphical window, and then right mouse button click and select Organize (Figure 5). The Organize command will pop up, and it will show the selected elements, which are the 3D elements I isolated. I can then move them to the designated location which in this case will be the 3D mesh component collector (Figure 5). Once I hit ok it will complete the command.
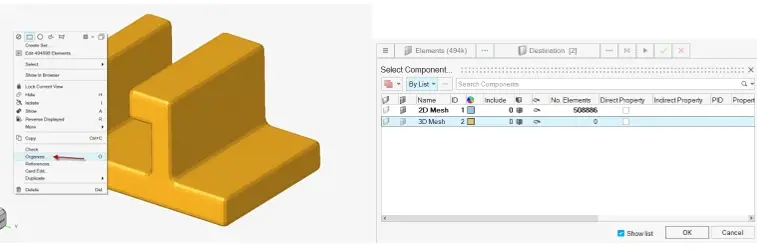
Figure 5: Left, Selecting Organize and Right, Organize Component Pane
Now that the command is completed, we can see that the 3D elements have been moved to the 3D Mesh component collector (Figure 6). Now let’s try the other method I typically do to move meshes to different component collectors.

Figure 6: 3D Mesh Component with 3D Elements after Organize Command
Method 2: Specifying Component during 3D Meshing
The second method is a method which may be familiar to you if you are a legacy HyperMesh user. This method allows you to select the component collector destination during the 3D meshing stage. We will begin this process after we have already generated our 2D Mesh. Our first step in this process is to make sure our 3D Mesh component collector is current (Figure 7).
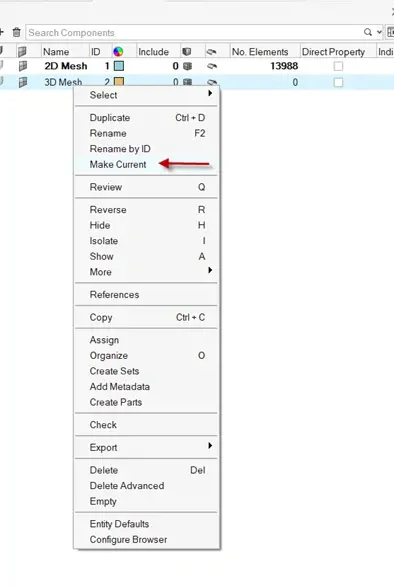
Figure 7: Making 3D Mesh Component Current
With the 3D mesh component collector current, we can now generate our 3D mesh. We need to go to our 3D mesh menu and select Tet mesh, and then select the Tet mesh options. The Tet mesh options menu is to the left of the component collector button and is shown below in Figure 8 via the red arrow. With the Tet options menu open, under the advanced submenu there is an option for selecting the component collector for the mesh destination. By default, HyperMesh uses the original component collector location. We need to change this, as the original component collector would pertain to the seeded 2D mesh component collector. If we change this Mesh Destination option to current component, it will generate the mesh on the current component which is our 3D Mesh component collector. So, let’s change this to current component then hit mesh!
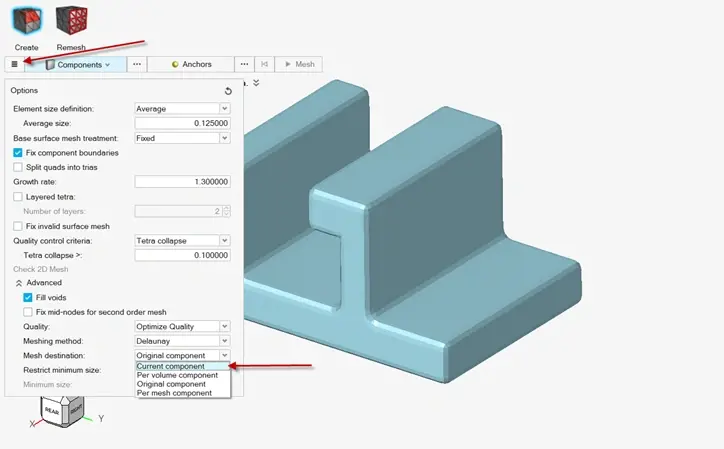
Figure 8: Mesh Destination Settings Under 3D Tet Mesh
After doing this it will generate the mesh and if we look at our component menu, we will see that the mesh has been successfully put into our 3D Mesh component collector (Figure 9).
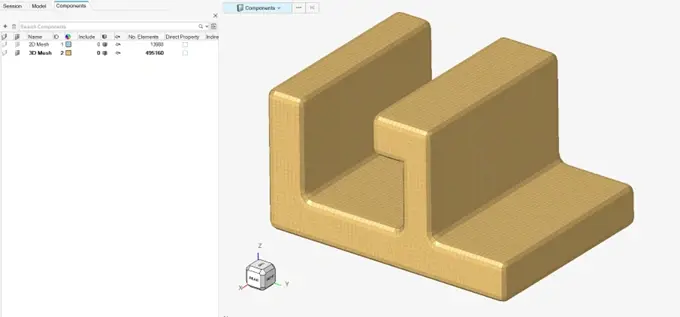
Figure 9: 3D Mesh Component after 3D Tet Mesh
So just like that we have gone through two methods I use daily to make my meshes easily organized. I hope these tips can help you in your future meshing scenarios in HyperMesh. If you have any further questions on Altair HyperMesh or any other Altair solution, please reach out to us here at TrueInsight!