
TrueInsight
Siemens/Altair Channel Partner
Menu


How to Shell a PolyNURBS Solid in Altair Inspire 2022
Altair Simulation 2022 includes many new enhancements for customer applications. Check out this blog post on one such feature in Altair Inspire.
How to Shell a PolyNURBS Solid in Altair Inspire 2022
PolyNURBS is one of the more powerful features in Altair Inspire. Users can utilize the PolyNURBS tool to create unique geometry through the use of manipulating boundaries called cages. As a result of moving the cages, users can create unique organic shapes without the traditional pain of organic surfacing in parametric based CAD tools. One the features I had been desiring for PolyNURBS, was a shell feature which allows users to click on a PolyNURBS solid and automatically create a thin wall. Note this feature is on the general parametric modeling tab in Inspire but could not be utilized for PolyNURBS solids in previous versions. However, with the release of Altair Inspire 2022, you can now create a thin walled PolyNURBS solid. In today’s blog I am going to go through the process of how to shell a PolyNURBS solid.
Step 1: Create a PolyNURBS Solid
In my case, I am going to create a PolyNURBS solid by going to the PolyNURBS menu in Altair Inspire, and then clicking on the PolyNURBS Primitive solid icon (Figure 1).
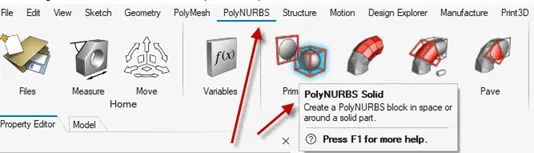 Figure 1: PolyNURBS Solid Creation
If you have never created a PolyNURBS solid/surface in Altair Inspire, the basic function is you start with a primitive, and the primitive allows you to drag and create the shape, as you can see below in Figure 2. With the use of this primitive, you can create complicated organic surfaces and solids in a fraction of the time compared to traditional parametric CAD. For more information on PolyNURBS modeling commands check out the following video.
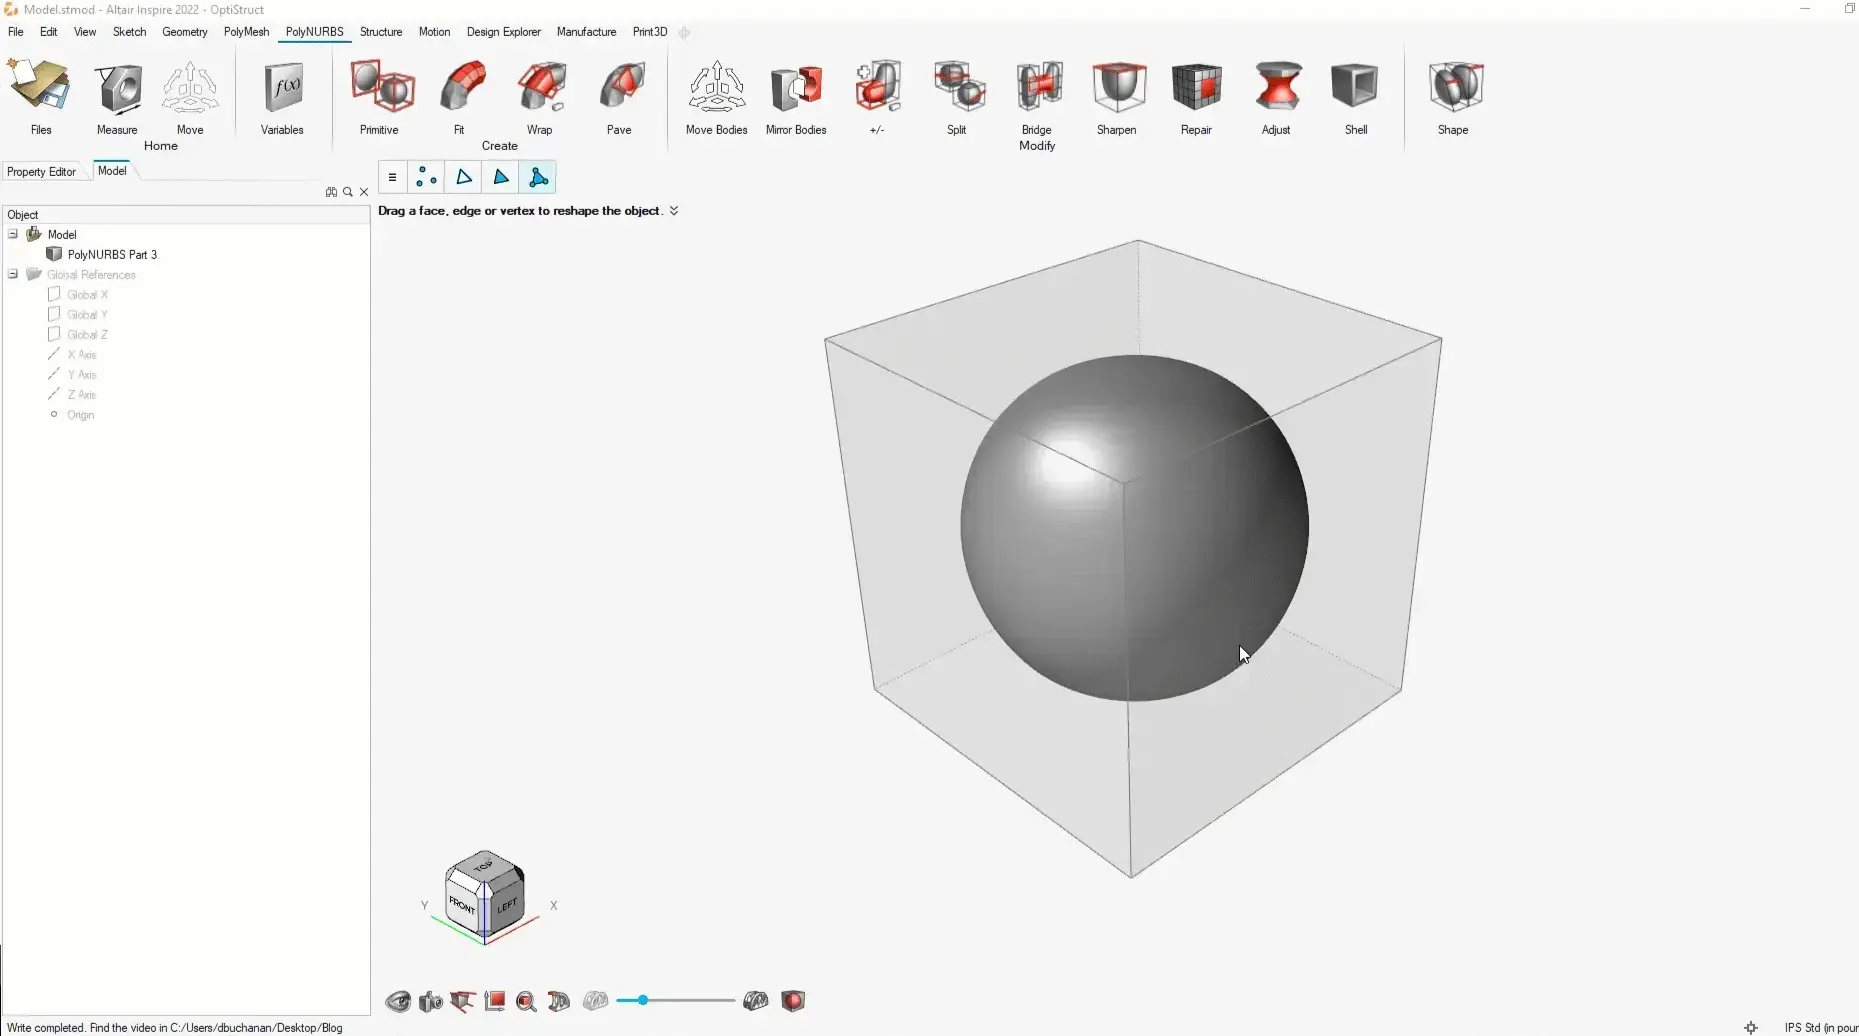
Figure 2: PolyNURBS Primitive Solid Tool
Through PolyNURBS creation tools, I create a final shape which I will utilize for my potential design and is shown below in Figure 3.
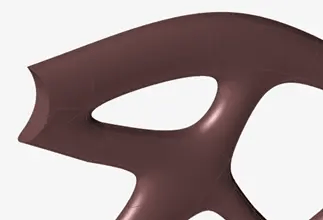 Figure 3: Finished PolyNURBS Solid
Step 2: Shell the PolyNURBS Solid
With the release of Altair Inspire 2022, I can now shell my PolyNURBS solid to further reduce mass. Since I have now created my PolyNURBS Solid part, I can now remove mass by utilizing the new PolyNURBS shell feature (Figure 4). The PolyNURBS shell feature creates a uniform wall thickness, so it removes mass and maintains an outer wall on the PolyNURBS solid, much like shell features in traditional parametric CAD modeling tools.
 Figure 4: PolyNURBS Shell Feature Location
Once a user clicks on the shell icon, it will prompt the user to select a PolyNURBS cage where you want to apply the shell command. It will additionally ask the user for the wall thickness the user wants to apply. In my case, I am going to click on the PolyNURBS end and specify a thickness of .01 inch and hit Enter. After doing this the shell feature will automatically shell my PolyNURBS solid to reflect this shelled command.
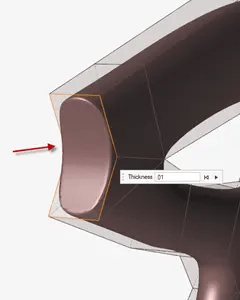
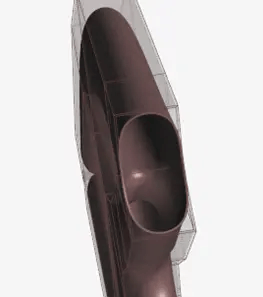
Figure 5: PolyNURBS Shell Command (Left) PolyNURBS Finished Shell (Right)
As you can see the process to shell PolyNURBS solids, is now very easy with the new PolyNURBS shell command in Altair Inspire 2022! For more information on Altair Inspire or other Altair product please reach out to us here at TrueInsight, and we will be happy to answer any questions you may have on Altair.