
TrueInsight
Siemens/Altair Channel Partner
Menu


How to Adjust Element Normals in HyperMesh 2026
In this blog we walk you through how you can adjust your element normal in Altair HyperMesh
Element normals are fundamental in utilizing shell elements, in that it ultimately drives the stress results of an analysis. If you are unfamiliar with an element normal, it just represents which direction a surface element is facing, i.e top or bottom. When dealing with composites or other shell-based element applications, stress accuracy for accurate element normals is vital. This applies to shell modeling as it represents the top and bottom surface, and ultimately how the membrane and bending stresses are calculated, so it is imperative to know how to set up element normals. In today’s blog I am going to walk you through how you can adjust your element normal in HyperMesh!
How to Set the Element Normal
So, let’s first open a model in HyperMesh, I am going to be utilizing a composite shell element configuration, as this would be a perfect application for setting the element normals (Figure 1). With the model open, we can see that it is already meshed and we begin the process of checking or reversing the element normal.
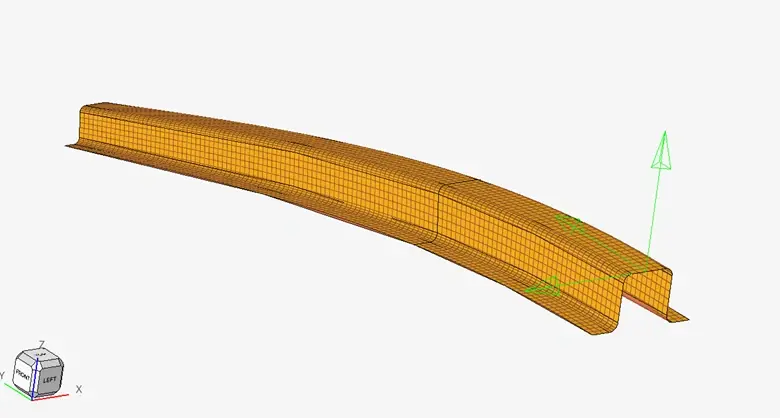
Figure 1: Composite Shell Model
With the model meshed we can activate the element normal menu by going to the 2D ribbon menu and selecting the “Normals” icon for element normal. Within the icon there are two different commands, visualizing the current element normal and setting the element normal (Figure 2). Let’s first visualize the element normal on our model.
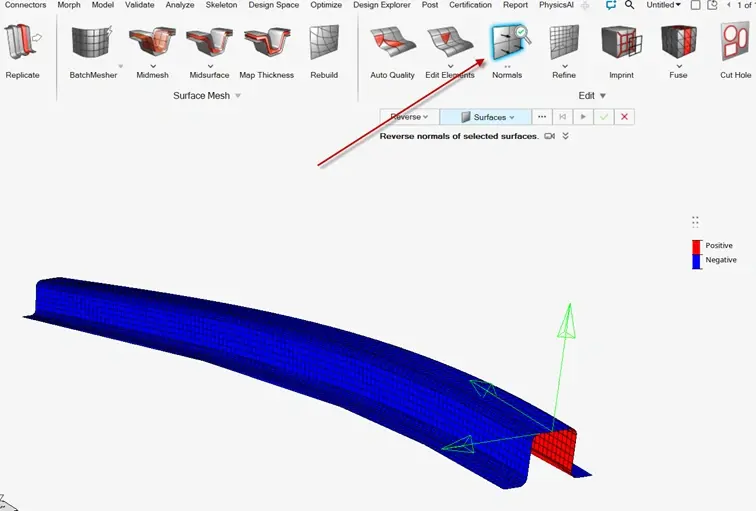
Figure 2: Visualizing Element Normal, and Location of Element Normal
We can look at our shell and see that the positive and negative portions of normal are set in a direction that runs counter to what we want for our bending stress calculation. Thus, we need to reverse the element normal, so to do this we go back to the 2D ribbon but this time we click on the magnifying class on the “Normals” icon which allows us to set the element normal (Figure 3).
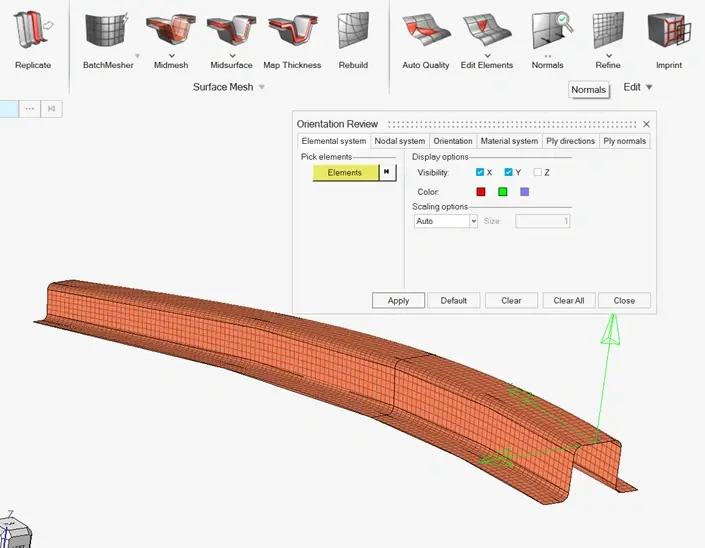
Figure 3: Setting Element Normal
Within the element normal micro dialogue box you see a number of tabs which are available, the elemental system, nodal system, orientation, material system, ply directions, and ply normals. Lets start with the elemental system and select elements, we can select all or a portion of the elements to reverse the normal. In our case we will select all elements and then hit apply, after doing so we can see we have reversed the normal in Figure 4.
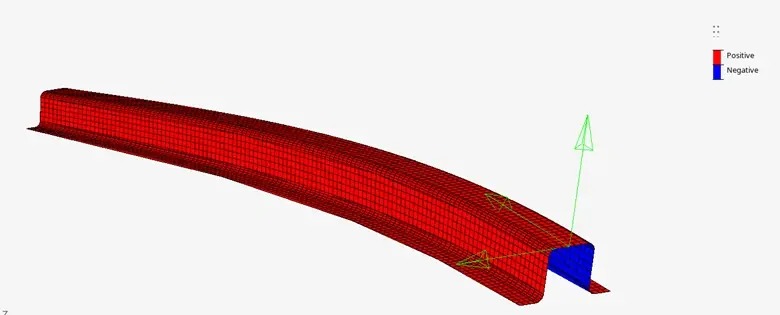
Figure 4: Reversing Element Normal
The other really useful thing about the micro dialogue box, is we can visualize the vector orientation of the element normal. To do this instead of hitting colors we just make sure the vector are checked and then hit apply in the micro dialogue box and we will have a visualization of the element normals via a vector perspective (Figure 5).
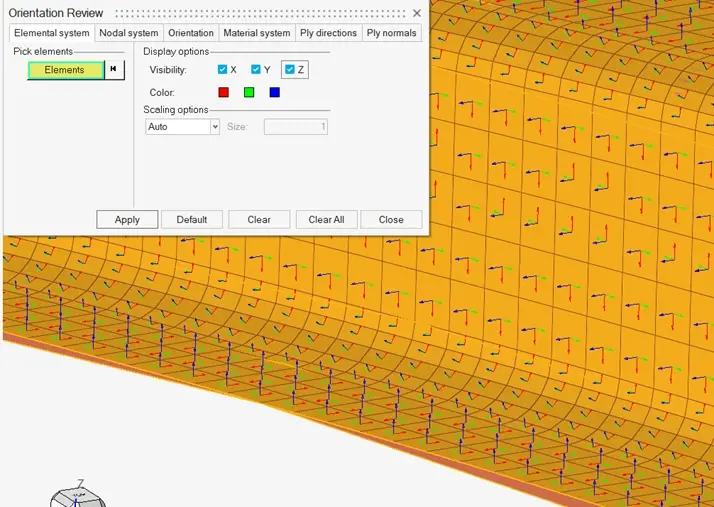
Figure 5: Element Normal Vector Selection
Note in the element normal box there are a number of other options, specifically the nodal system and orientation of individual components can also be selected as well. The other really important ones are if you are modeling specific plies for composite modeling, you can adjust the element normal as well here. So give it a shot and work your way through adjusting element normals! The next time you run with a shell element, make sure your stress calculation is accurate by making sure your top and bottom surfaces are reflected properly! If you have any further questions on Altair HyperMesh or any other Altair or Siemens solution, please reach out to us here at TrueInsight!