
TrueInsight
Siemens/Altair Channel Partner
Menu


Axe Throwing with Altair Motion Simulation
See how we used Altair Motion Simulation to optimize axe throwing. HyperStudy to visualize the comparison.
For those of you unfamiliar with axe throwing, it involves a competitor throwing an axe at a target, attempting to hit the bullseye as close as possible. Recently, my TrueInsight colleagues and myself decided to give this activity a try. After a few throws with my colleagues (none of us lost any limbs, thankfully), I realized that the most accurate throws were throws with uniform motion rather than aggressive force. I then thought if I could understand the proper launch angle, I could obtain an understanding of the best way to hit the center of the target each time. Unfortunately, I did not have expensive motion capture cameras at my disposal to understand good launch angles, but I did have the power of Altair Motion Simulation to simulate this exact scenario! Therefore, in today’s blog I am going to show you how you can utilize Altair’s Motion Simulation tools to optimize kinematic scenarios.

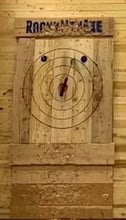
TrueInsight team throwing Axes (Left) and Target with lack of TrueInsight axes (Right)
Step 1: CAD Creation
The first step in simulating the axe throwing is to sketch a representative axe and target in CAD (Figure 1), and to then utilize that geometry for motion simulation. I sketched a CAD model representing the axe and target using Altair Inspire. The great thing about Altair Inspire is, it is a CAD/FEA/Kinematics environment all within the same tool. I can create geometry, and then simulate the geometry all within Altair Inspire (check out this video for more information on Altair Inspire). Note, if I had been working with another CAD tool (i.e., SOLIDWORKS, Fusion, Creo, etc), I could have also imported that model directly into Altair Inspire.
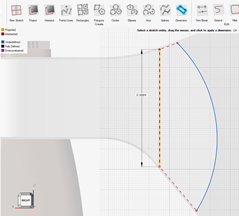
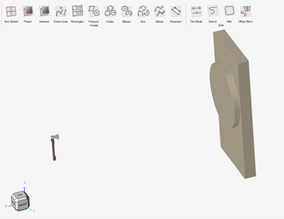
Figure 1: Creating Axe and Target (Left) and Final CAD model in Altair Inspire (Right)
Step 2: Create Motion Simulation with Altair Inspire
Within the Altair simulation suite, there are numerous kinematic motion simulation tools and solvers. For our axe throwing scenario we are going to utilize Altair Inspire Motion and Altair MotionView to set up our motion simulation. I wanted to create a baseline motion scenario first, before moving into optimization, thus I started out with Altair Inspire Motion. Since I created my CAD model in Altair Inspire, all I had to do was to then click on the motion ribbon and apply the kinematic boundary conditions for our scenario. In our case the primary variables are launch angle and exit velocity of the axe. Therefore, in our case I applied an angular velocity that would allow for about one rotation of the axe prior to hitting the target (Figure 2).
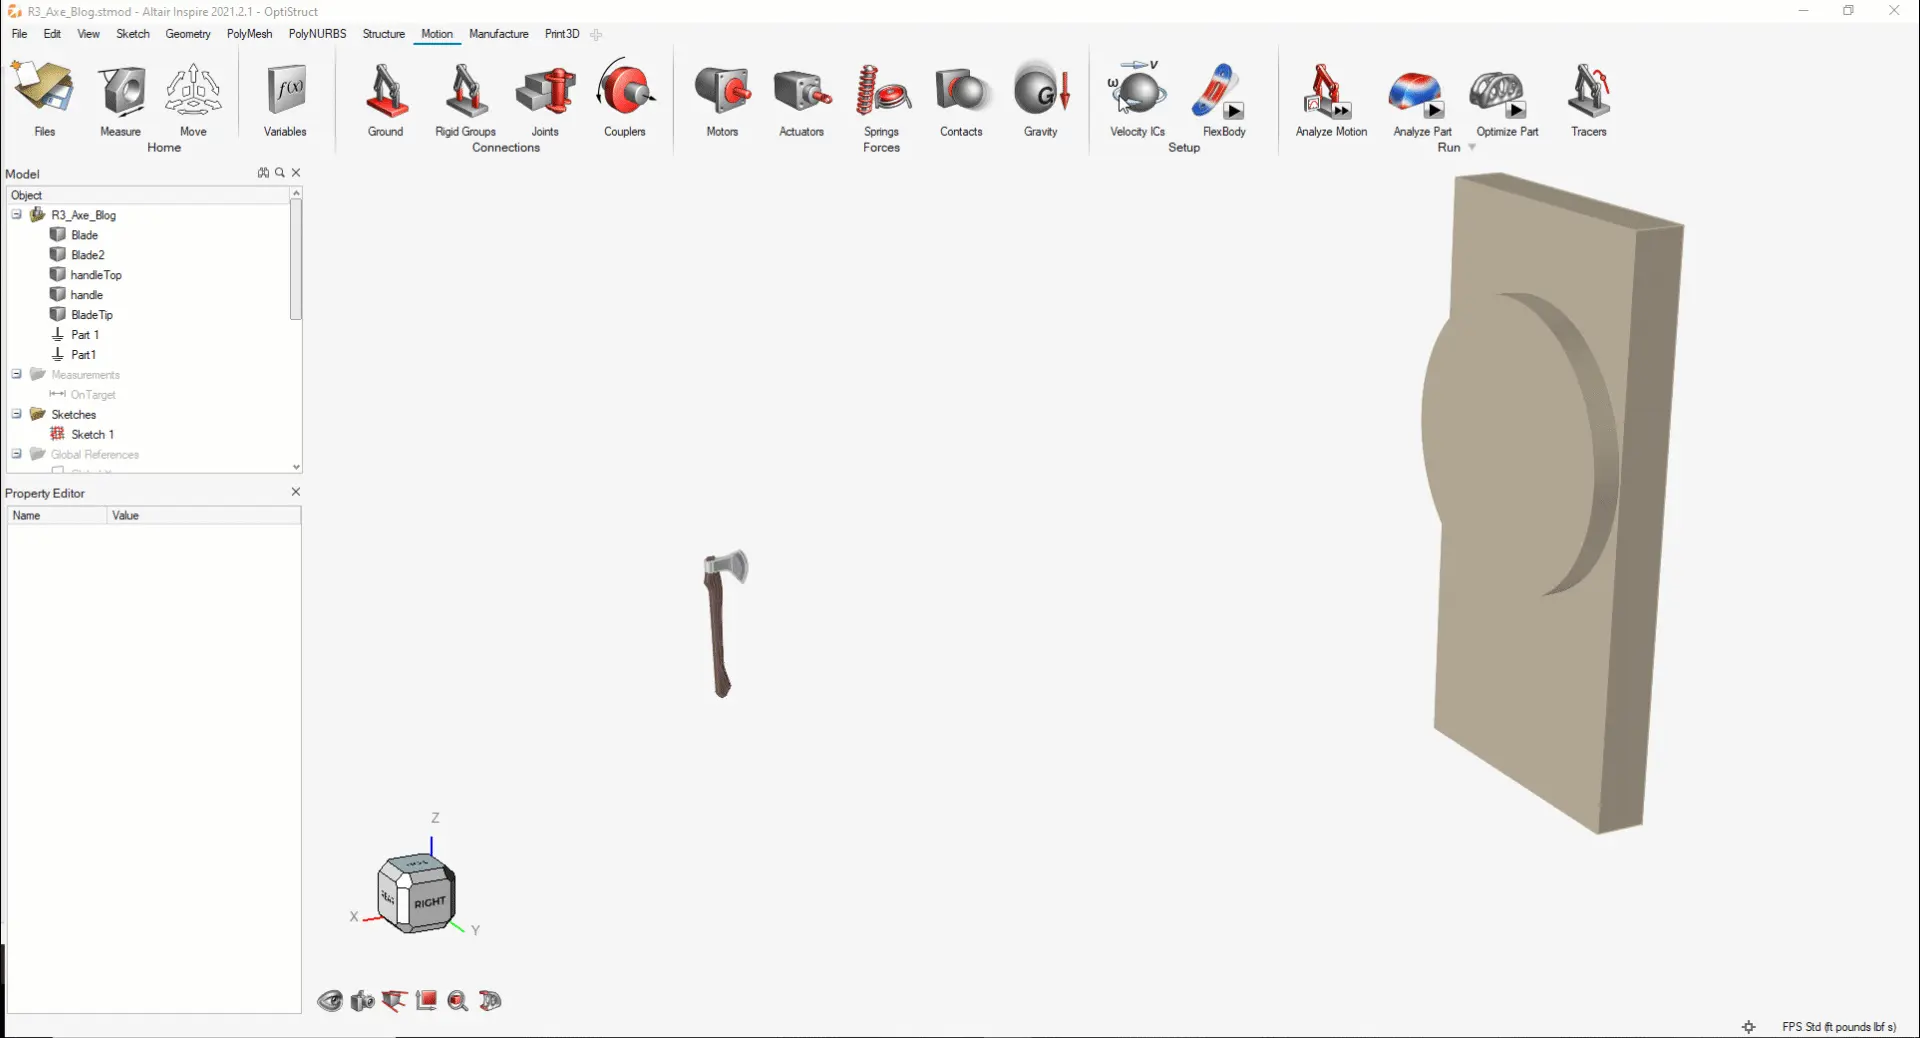
Figure 2: Boundary Condition Creation Altair Inspire Motion
After creating the velocity boundary condition, I needed to fix the target to the ground. I did this through a grounded boundary condition in the Altair Inspire Motion boundary condition ribbon. At this point I was now able to analyze my scenario and see the results of the motion simulation.
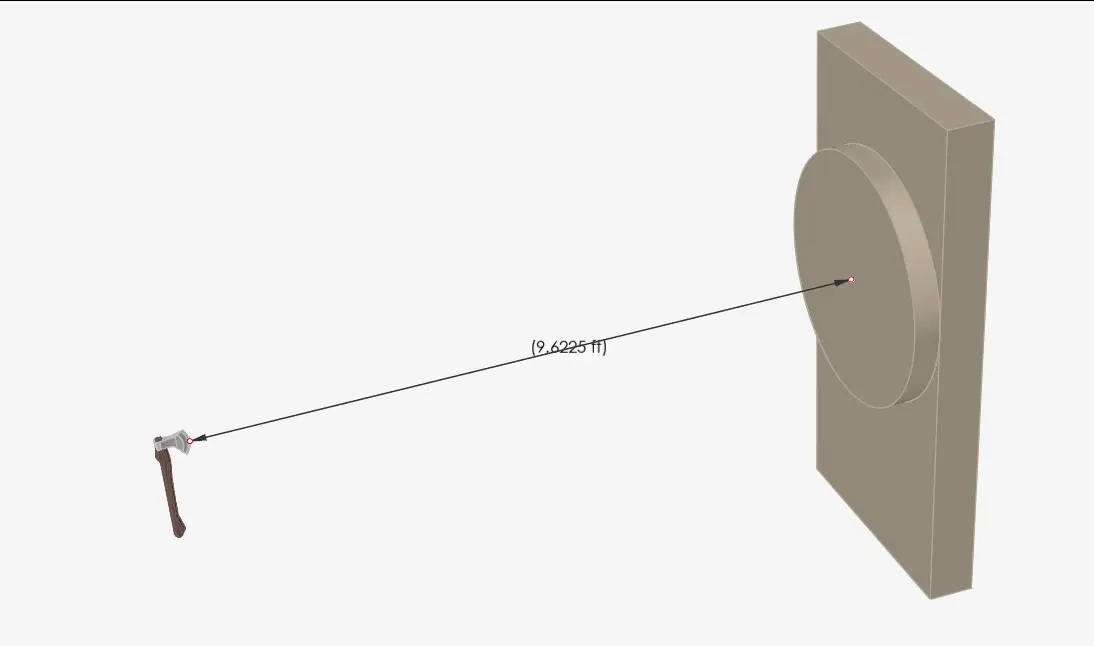 Figure 3: Altair Inspire Motion Results
Through motion results (Figure 3) I can view the axe trajectory through adding a dimension and see how the axe moves towards the target. Through looking at my results, I can see that the axe hits the target but is not near the bullseye. Thus, if I want to optimize my motion for a variety of launch angles, I will need to run an optimization. Altair Inspire Motion does have the ability to run optimization, but I will need some more advanced optimization techniques. Therefore, I am going to utilize Altair MotionView with Hyperstudy to run the optimization scenario for the best launch angle.
Step 3: Optimize Motion with MotionView and Hyperstudy
Altair MotionView is an industry leading motion simulation tool, and it is generally utilized for advanced motion simulation scenarios. It is important to note that while Altair Inspire Motion does not have as many features as Altair MotionView, both simulation tools utilize the same motion solver. What this means, is that I can import my Altair Inspire Motion model directly into Altair MotionView and save time on my setup.
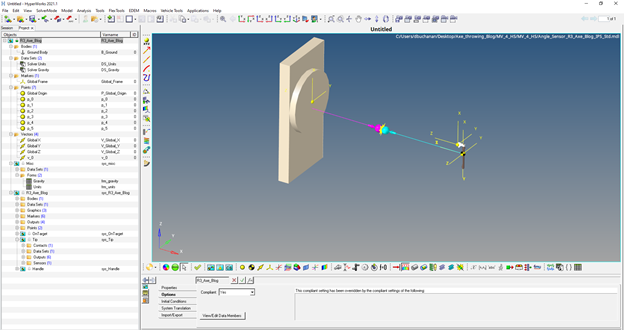
Figure 4: Altair MotionView Model Setup
After importing my model into Altair MotionView (Figure 4), I can apply numerous advanced boundary conditions that are not available in Altair Inspire. In our case I want to create a variable for the different launch angles and utilize that variable for an optimization with Altair Hyperstudy. I can create a linked variable for the launch angle by clicking on the point of the axe (shown by the red arrow in Figure 5) and then specifying it as a condition for optimization.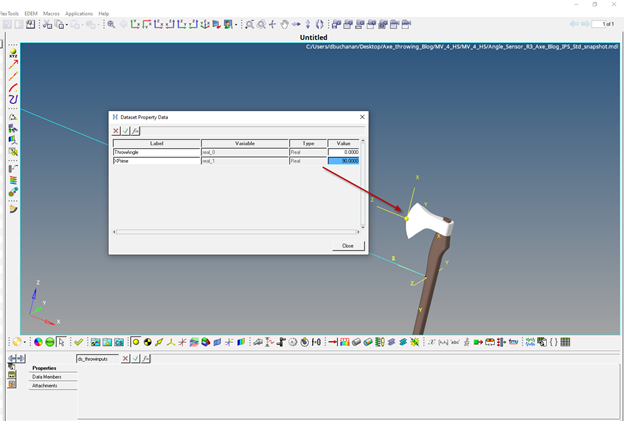
Figure 5: Axe Point Selection Variable for Optimization
After this variable is created, I can then run an optimization with the use of Altair HyperStudy through adjusting the launch angle variable I created in Altair MotionView (Figure 6). In my case I want to see the effect of the launch angle ranging from 0-360 degrees from the initial point location.
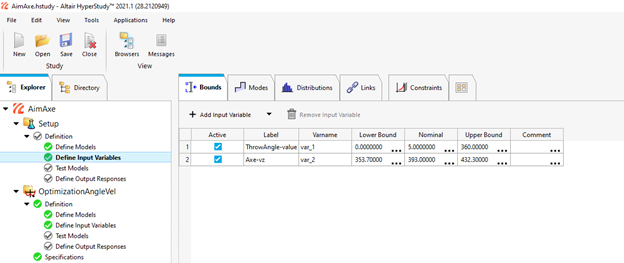
Figure 6: Altair Hyperstudy Variable Adjustment
After keying in my variables I can run the scenarios directly from the Altair Hyperstudy interface. I look at the output in Altair Hyperstudy and see that the optimum scenario for hitting the target at the bullseye will be 7 degrees from the starting position with the same initial velocity I have applied (Figure 7). With a throwing angle offset of about 7.5 degrees, it will only be .15 inches from the Bullseye. If I wanted to run additional scenarios to get closer I could, but .15 inches is close enough for me! With overlay postprocessing, I can overlay all of my Altair Hyperstudy results to see which axes were close to the bullseye and which were far from the center of the target (Figure 7).
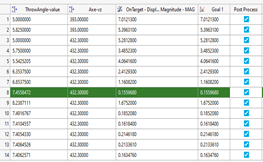
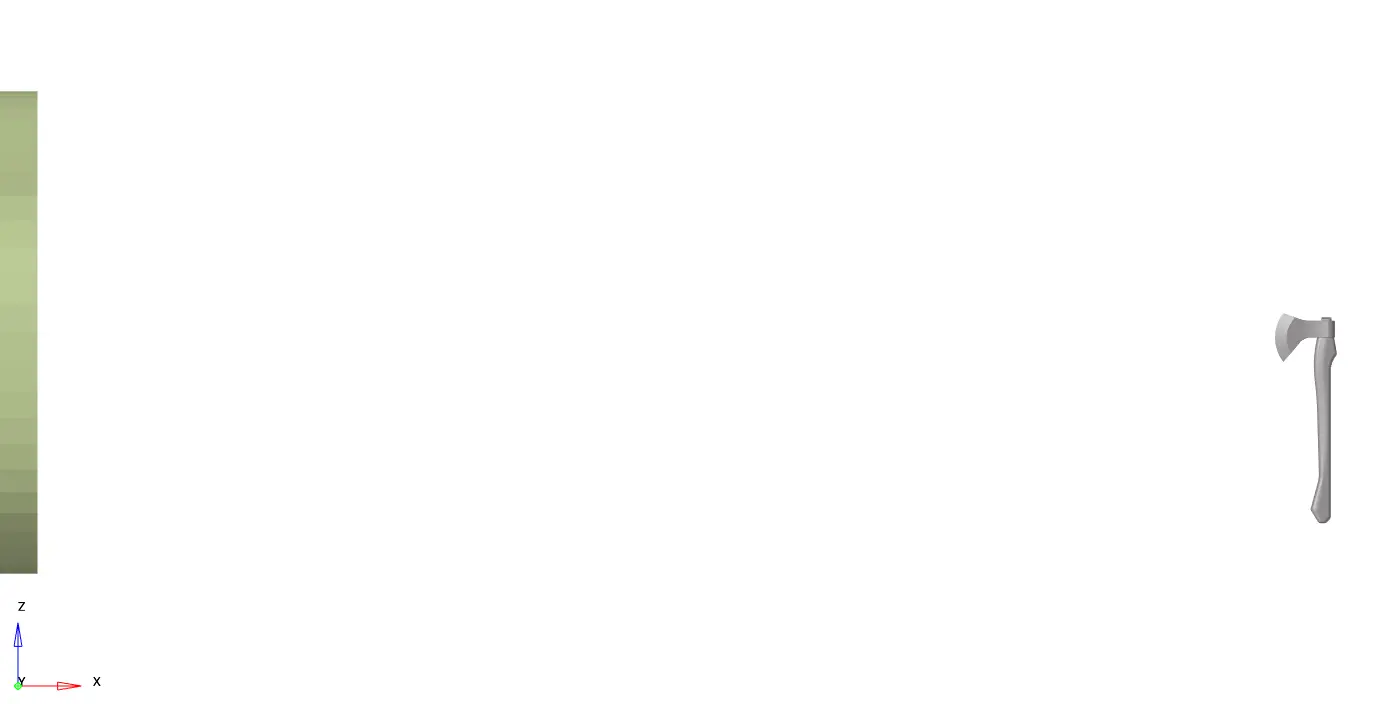
Figure 7: Altair Hyperstudy Optimized Results
Through the power of setting up the problem with Altair Inspire Motion to optimizing the motion solution with Altair MotionView and Altair Hyperstudy, I was able to determine the optimized launch angle and velocity all with a few mouse clicks. For the next group outing I am ready to hit that bullseye consistently, watch out TrueInsight team! If you have any additional questions about how Altair’s simulation tools can help you optimize your designs, please reach out to use here at TrueInsight!